Overview
InformaCast is a powerful software platform designed for mass notification and emergency communication within organizations. It enables users to send messages instantly to a variety of communication devices including IP phones, mobile devices, computers, digital signage, and paging systems.
Configuring your InformaCast Integration
To configure your integration in the WSPER console, you'll need to configure the following 4 pieces of information:
- Security Group
- Service Account & Token (Wsper will need this Token)
- Scenario (Wsper will need this Scenario ID)
- API Device
Generating an Informacast Security Token
- Navigate to the "Security Groups" tab under the "Admin" tab and select the "Create Security Group" button./
- Then, enter the name of the security group and select the "Save" button.

- Once created, you will need to configure the global permissions to include "View Sites," "View Scenarios," and "Create Scenario Notifications."

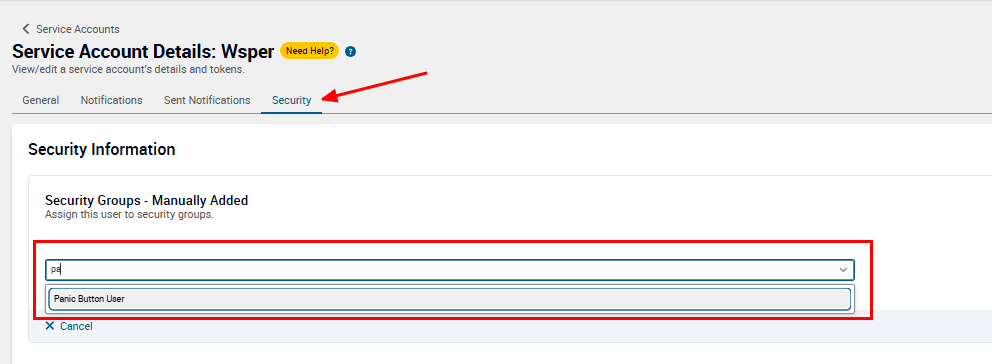
- Navigate to the "Service Accounts" tab and create a new Service Account.

- Name the new Service Account Wsper Panic Button, Click Save

- Then, assign the security group you made in steps 1-3 to this Service Account (Panic Button User)
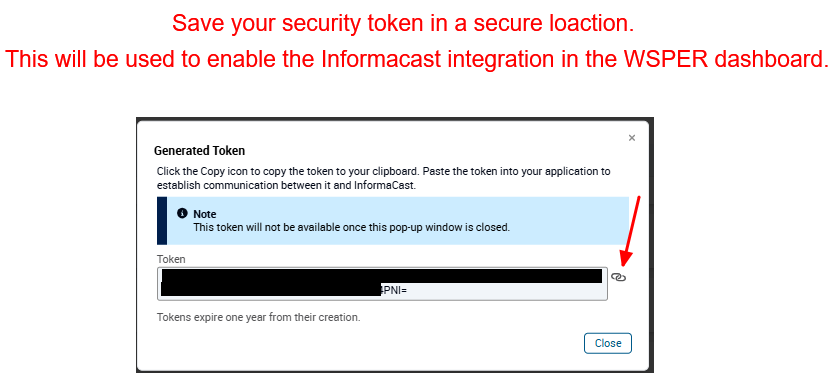
- Click on the Token drown down icon and click the button "+ Create Token"
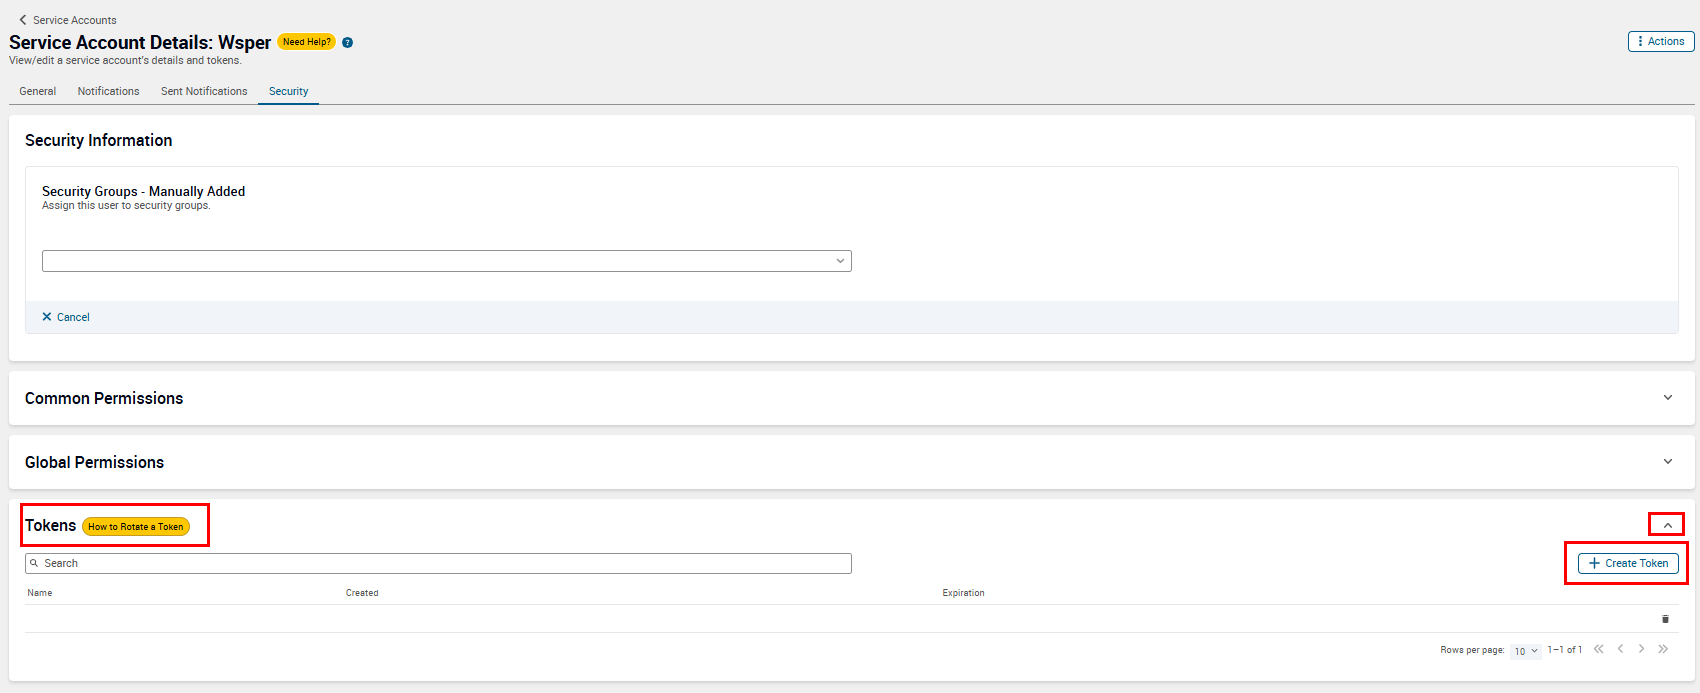
- Name the Token and click save.
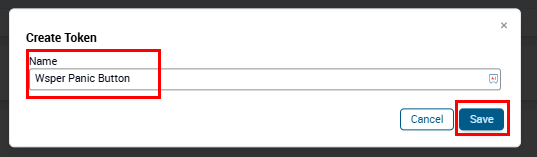
- Click the copy icon and save the token in a safe location as we will need this to integrate the panic buttons to the Informacast system.
Creating a Scenario
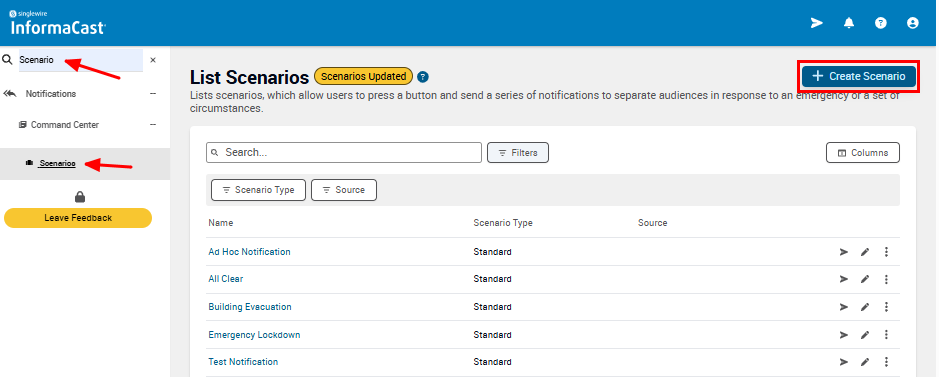
- Search "Scenario" and select Scenarios then click the "+ Create Scenario" button
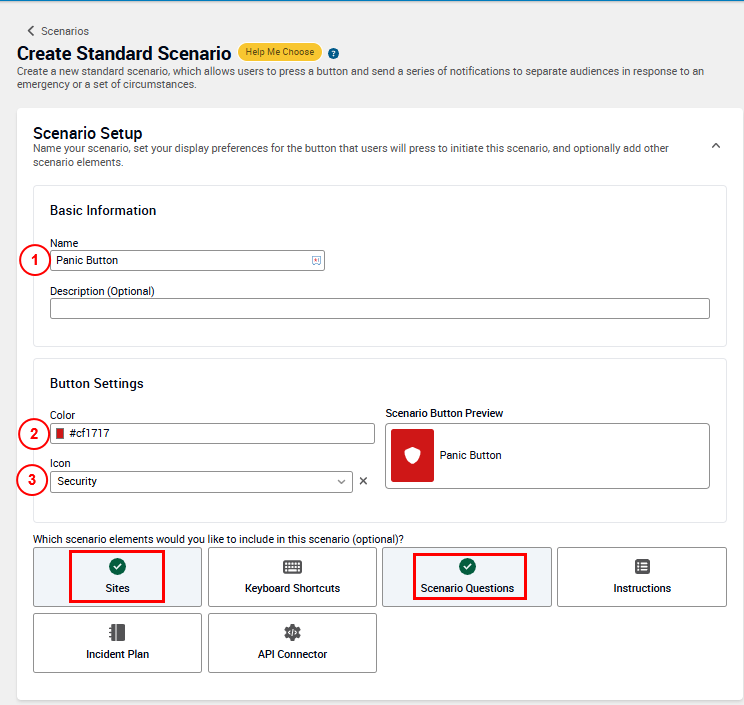
- Select the Scenario type, "Standard" and click Continue
- Create the Scenario type, dashboard name, icon and color. "Sites" and "Scenario Questions" MUST BE SELECTED
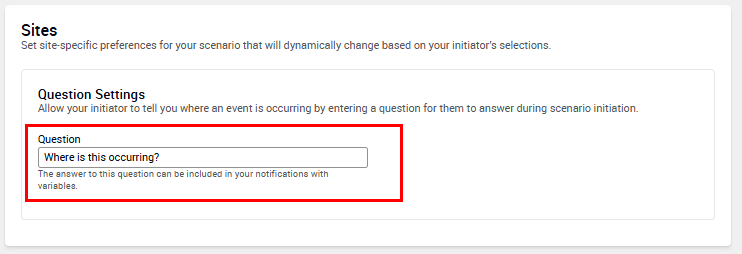
- Under the "Sites" section add question, "Where is this occurring?"
The scenario must have the following question data. Click save when entered.
Variable Name: alartType
- (Must be exact with lowercase "a" and uppercase "T")
- Title: "What type of alert is this?

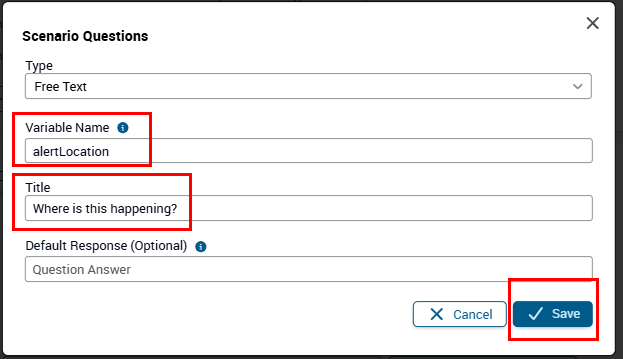
- If you have a wearable Panic Button please also add this Variable and Title:
Variable Name: alartLocation
- (Must be exact with lowercase "a" and uppercase "L")
- Title: "Where is this happening
Final Questions should look like this IF YOU HAVE A WEARABLE ID BADGE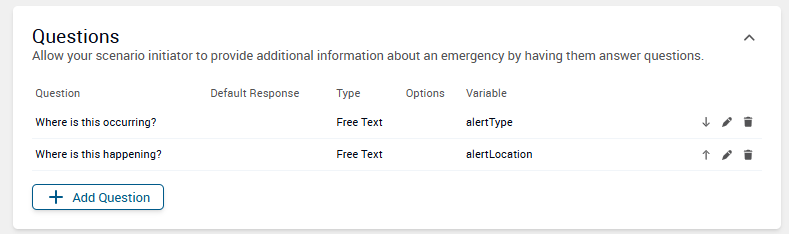
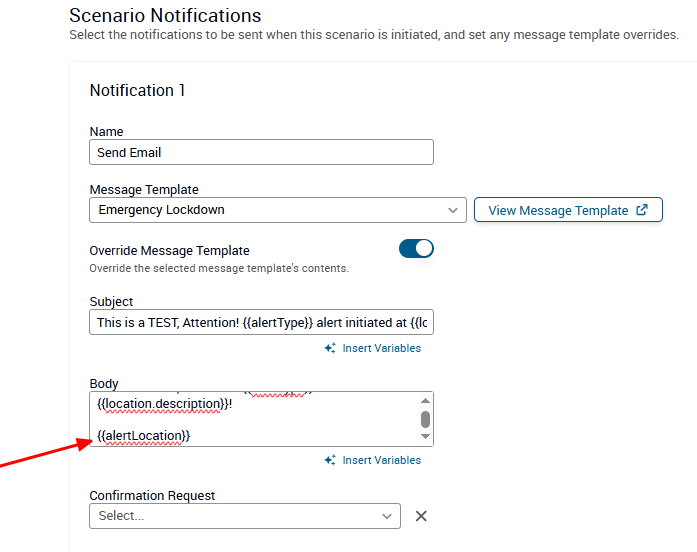
- Create your custom notification. Wsper sends the {{alertType}} and the {{location.description}} and the google maps url, {{alertLocation}} to infromacast which can be used as variables in the notifcations. Click Save when done.
Option 1: No Wearable ID Badge
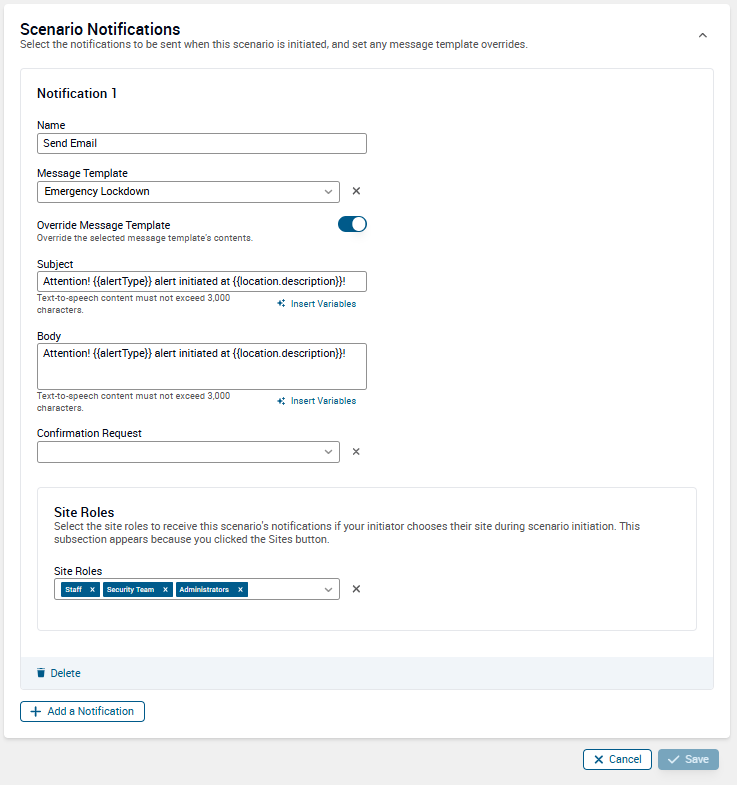
Option 1: Wearable ID Badge with {{alertLocation}} which will show a google maps url link.
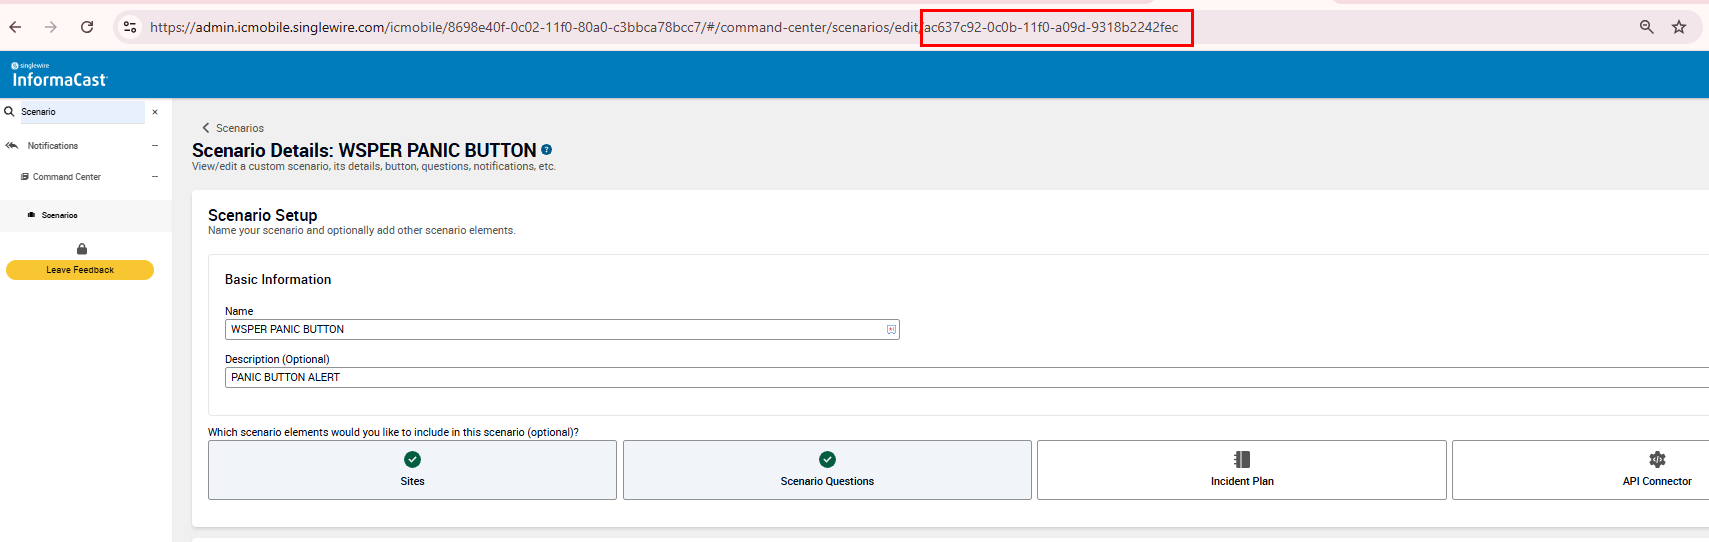
- Once saved, click the pencil icon to open the newly create Scenario. Then copy the Scenario ID from the url bar.
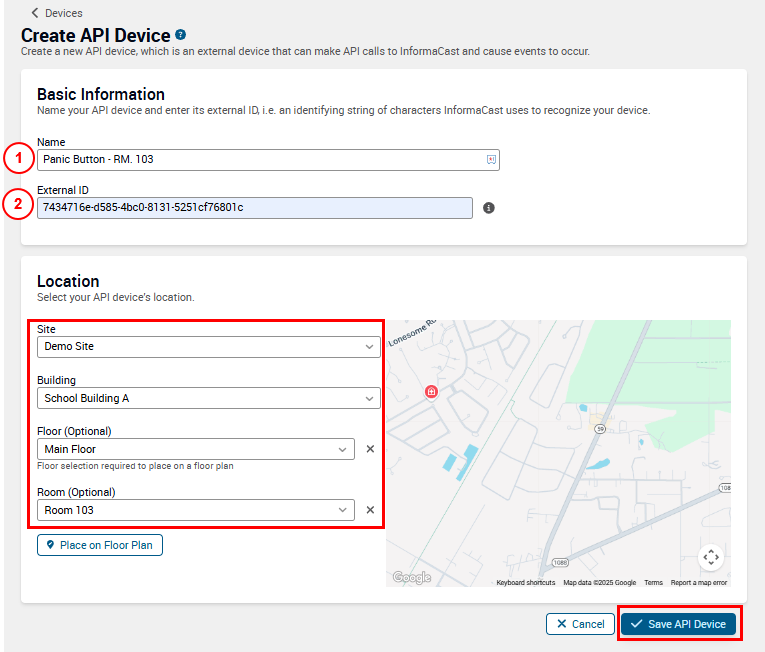
Creating a API Device
- Search "API Devices" click the Api devices tab the click "+ Create API Device"
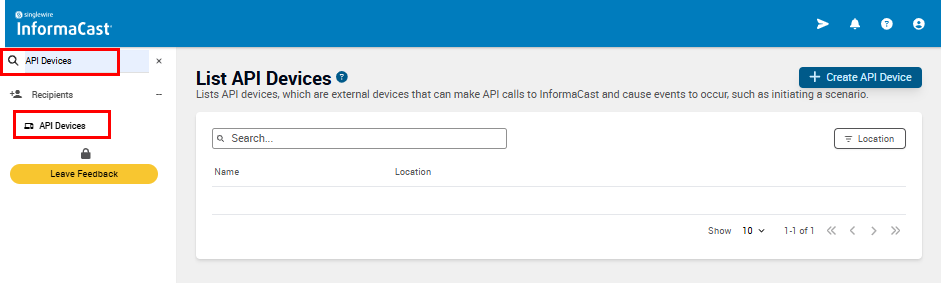
- Add Device Name, the Device ID (From the WSPER Dashboard) and then assign the device location. The Site, Building, Floor and Room should already be created. Click "Save API Device" when complete