Switching a Device from Test Mode to Live Mode
Step 1: Sign in to the portal
## Logging in to the portal
For optimal viewing, please use a desktop.
- Visit the WSPER Portal: Go to getwsper.com/portal using your web browser.
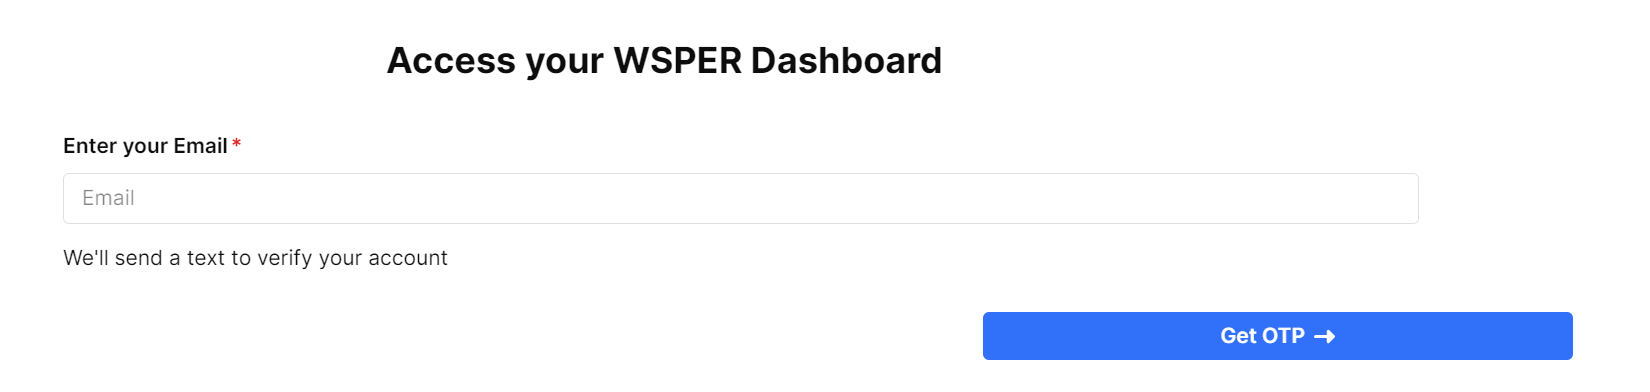
- Enter Your Email: On the login page, you will be prompted to enter your email.

- Receive Your One-Time Password: After entering your email address, click on the "Request OTP" button, and you will receive a one-time password through SMS. This code is used temporarily to verify your identity.
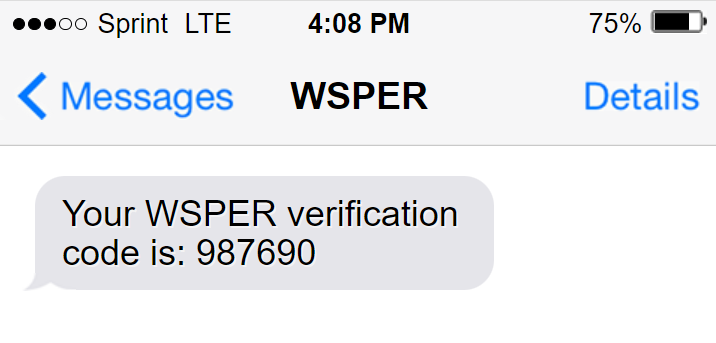
- Enter the OTP: Once you receive the OTP on your phone, enter it in the portal to complete the login process.

- Access Your Account: After successfully entering the OTP, you will be logged in to the WSPER Portal and can access your account and settings.
Step 2: Click “Device Test Mode”
From the main dashboard:
Under Account Analytics, locate the tab labeled Device Test Mode.
Click Device Test Mode.

This section displays all devices grouped by location
Step 3: Move Device to Live Mode
Within the Device Test Mode section:
Locate the device you want to activate.
For each device row click the yellow "Test" button located on the 'mode" column.
Click the "Live - Active monitoring 24/7" option and click save at the button to save the device.
Once confirmed, the device will immediately transition to Live Mode.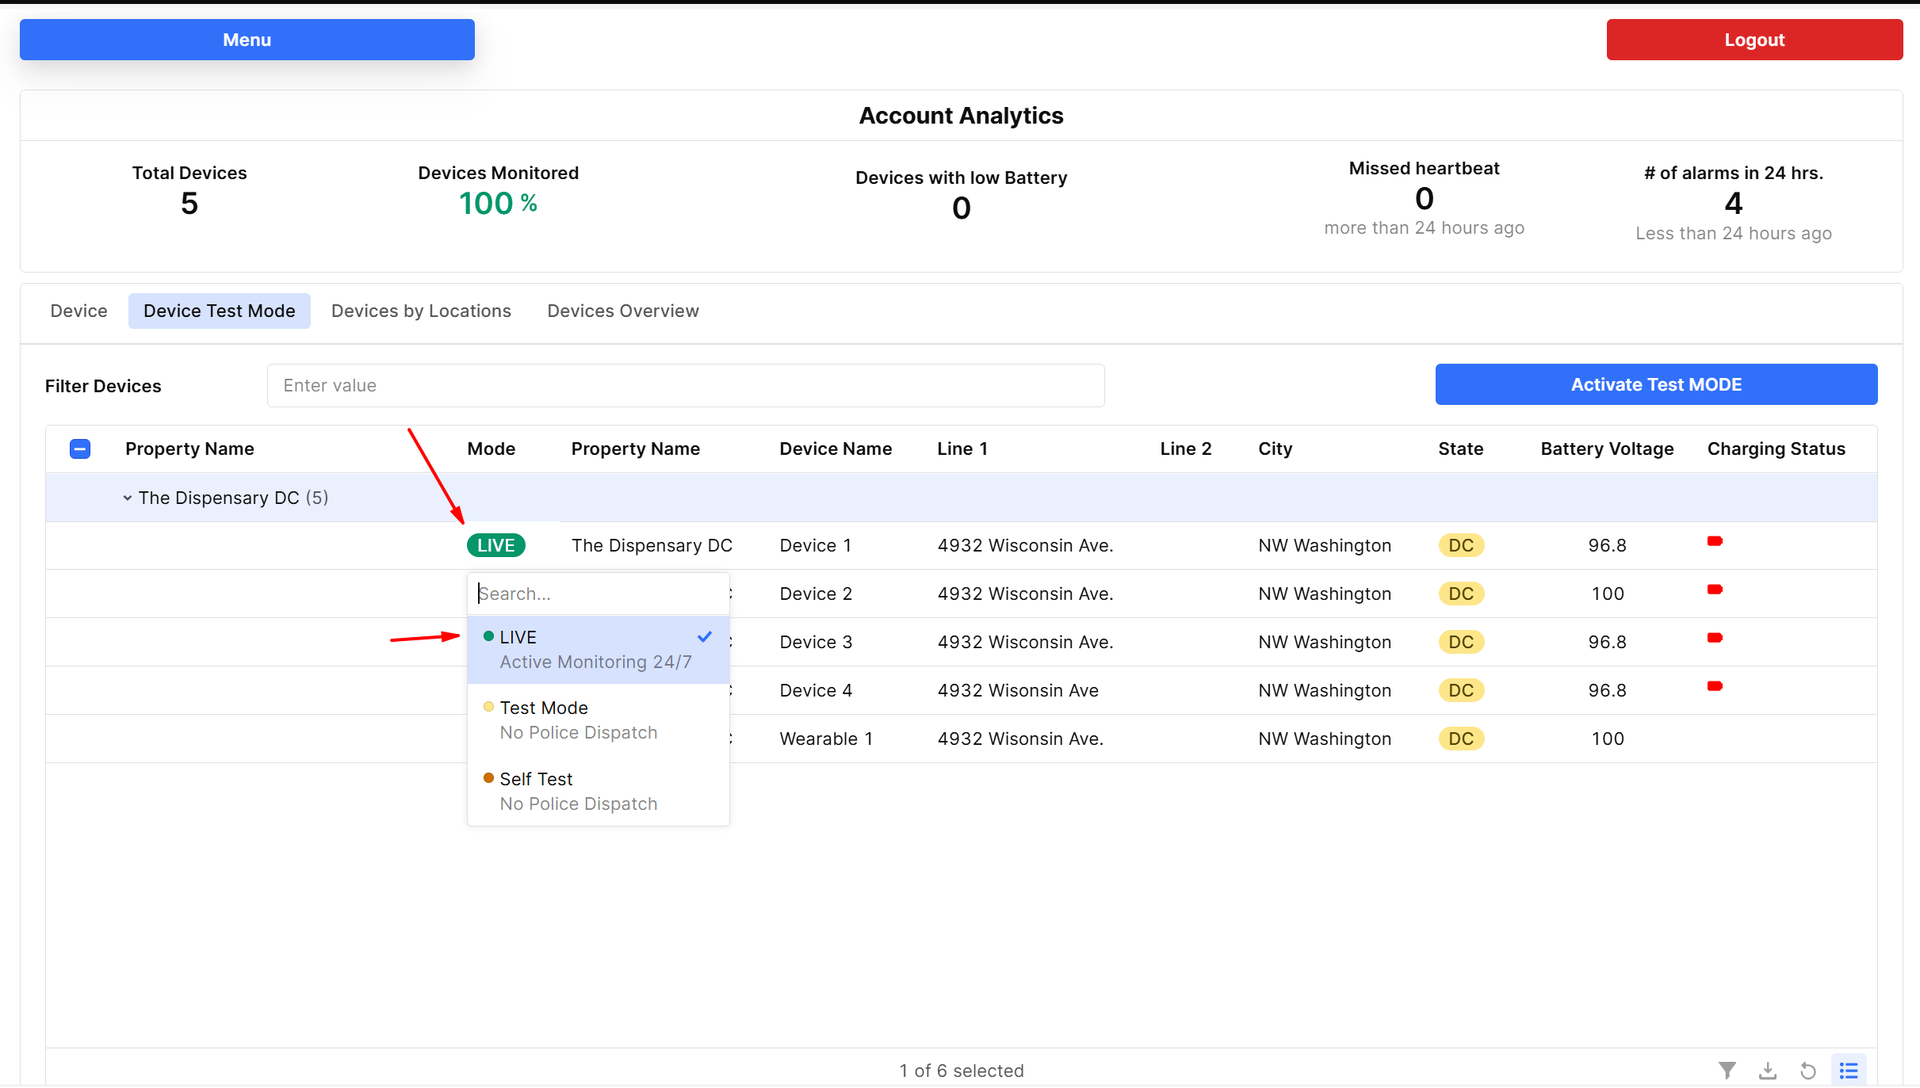
⚠️ Important
Once a device is in Live Mode:
Monitoring center notifications are active
SMS/Email alerts are active
Dispatch procedures may begin
Integrations will trigger
Ensure all device details and contacts are configured correctly before switching to Live Mode.
Need more help?